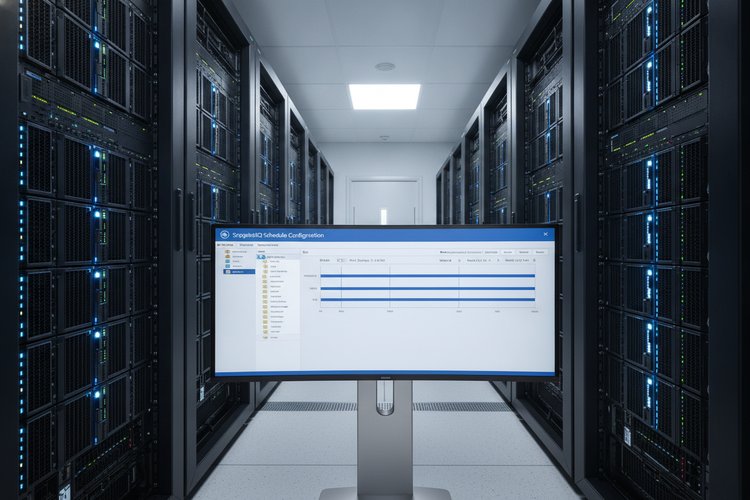
Data protection and business continuity are critical requirements for enterprise NAS environments. Dell PowerScale (formerly Isilon) handles disaster recovery across distributed clusters through SyncIQ—its native, asynchronous file-based replication engine. Whether you are replicating petabytes of unstructured data across data centers or setting up local cluster-to-cluster synchronization, configuring your replication rules accurately is vital for maintaining tight recovery point objectives (RPO) and recovery time objectives (RTO).
SyncIQ operates at the directory level, allowing storage administrators to create granular policies tailored to specific workloads, Access Zones, and performance SLAs. Rather than replicating an entire storage array blindly, you can target individual file system paths, apply strict file matching rules, and tune network usage to prevent WAN saturation.
SyncIQ policy configuration forms the foundation of PowerScale disaster recovery, turning raw cluster storage into a highly resilient, failover-ready replica.
In this step-by-step guide, you will learn how to create SyncIQ policies in PowerScale OneFS using both the graphical web console and the command line. We will walk through pre-requisites, certificate authentication, policy options, file filtering, baseline sync execution, CLI automation commands, and DR failover readiness.
Understanding PowerScale SyncIQ Replication Scenarios
Before creating your first policy, it is essential to understand how SyncIQ moves data between PowerScale clusters. SyncIQ supports several distinct topology models depending on your organization’s business continuity architecture:
- One-to-One Replication: A primary source cluster replicates a specific directory structure to a dedicated disaster recovery cluster. This is the standard DR pattern for mission-critical enterprise applications.
- One-to-Many (Fan-Out) Replication: A single primary cluster distributes separate dataset directories to multiple remote target clusters for geographical redundancy or localized data access.
- Many-to-One (Consolidation) Replication: Multiple regional clusters replicate their local datasets back to a centralized corporate target cluster for unified archival and long-term backup retention.
- Cascading Replication: Cluster A replicates to Cluster B, which then acts as a source to replicate the dataset down to Cluster C, preserving WAN performance on the primary cluster.
Regardless of topology, SyncIQ operates as an asynchronous replication service. Changes made to the source file system are tracked by OneFS job engine threads using snapshot-based change-tracking algorithms. During each replication run, SyncIQ analyzes the source directory, identifies changed or modified blocks, and sends only the incremental delta across the network to the SyncIQ replication target.
What You Will Need Before Setting Up SyncIQ Policies
Setting up SyncIQ policies requires complete pre-check verification. Skipping any pre-requisite step will cause policy validation errors or connection failures when the replication engine attempts to contact the target cluster.
Ensure you have verified and configured the following components before proceeding:
- Valid SyncIQ Licenses: SyncIQ replication requires valid, active SyncIQ licenses installed on both the source and target PowerScale clusters prior to policy creation. Verify license status in the PowerScale OneFS WebUI under Cluster Management > Licensing or via CLI using
isi license licenses list. - Target Directory Preparation: The target directory path on the secondary cluster must be explicitly configured or set to allow automated directory creation. Ensure target path parent directories exist and possess identical file pool policies and Access Zone replication permissions to match source data access.
- Network Connectivity and Port Access: Both clusters must communicate across dedicated subnet interfaces or SmartConnect pools. Verify that TCP port 2081 (SyncIQ service port) and TCP port 8443 (OneFS API) are open on firewalls between source and target nodes.
- Administrator Privileges: Your OneFS user account must hold the
ISI_PRIV_SYNCIQrole on both source and target clusters to create policies, manage encryption certificates, and trigger jobs. - Matching OneFS Compatibility: While OneFS supports cross-version replication, both source and target clusters should ideally run matching major releases to take advantage of performance enhancements and extended feature sets. If you are also managing block or unified file systems in your data center, refer to our overview on Dell PowerStore Architecture for cross-platform comparative insights.
Step 1: Establish Target Cluster Certificates and Authentication
Modern OneFS releases (OneFS 8.2 and later) enforce encrypted TLS communication between SyncIQ endpoints to secure data in transit across public or untrusted enterprise WAN links. Before creating a policy, you must establish mutual trust between the source and target clusters using SSL certificates.
Follow these steps to establish cluster-to-cluster authentication:
1. Export or Generate Target Cluster Certificate: Log into the target PowerScale cluster WebUI and navigate to Data Protection > SyncIQ > Certificates. Download the target cluster’s public server certificate, or generate a self-signed certificate if a PKI enterprise certificate is not installed.
2. Import Target Certificate onto Source Cluster: Log into the source cluster WebUI, navigate to Data Protection > SyncIQ > Certificates, and click Import Certificate. Upload the public certificate obtained from the target cluster and give it a clear alias (for example, DR-Cluster-Target-Cert).
Establishing trusted SSL certificates prevents unauthorized nodes from spoofing replication endpoints and ensures encrypted payload transmission across WAN links.
3. Verify Secret Keys (Legacy or Non-Encrypted Authentication): If you are operating in an isolated network without SSL encryption enforced, you can configure shared secret keys under Data Protection > SyncIQ > Settings. However, standard security best practices strongly recommend enforcing TLS certificate-based encryption for all production deployments.
Step 2: Create and Configure the SyncIQ Policy in OneFS WebUI
With authentication established, you are ready to construct the primary SyncIQ policy using the OneFS graphical console. Open your web browser, navigate to your source PowerScale cluster administrative URL, and log in with administrative credentials.
In OneFS 9.5+, navigate to Data Protection > SyncIQ > Policies (or Mobility and Protection > SyncIQ in older OneFS releases) and click the Create a SyncIQ Policy button.
Defining Source Directory and Target Cluster Paths
The policy creation wizard opens with basic naming and directory path configuration parameters:
- Policy Name: Enter a descriptive, standardized name for the policy (e.g.,
SyncIQ_NFS_Projects_Daily). Avoid generic names liketest_policy. - Policy Description: Provide actionable context, including the source application owner, ticket reference, and target cluster name.
- Action Type: Select Sync (copies files and deletes target files that no longer exist on the source) or Copy (copies new and modified files but never deletes target files). For DR disaster recovery setups, standard practice is to select Sync.
- Source Root Directory: Enter the exact file system path on the source cluster (e.g.,
/ifs/data/engineering/projects). Ensure this directory exists before saving. - Target Cluster Address: Enter the fully qualified domain name (FQDN) or IP address of the target cluster’s SmartConnect zone (e.g.,
dr-cluster-synciq.domain.local). - Target Directory Path: Enter the destination path on the target cluster (e.g.,
/ifs/data/dr_replica/engineering/projects). If configuring multi-tenant environments, ensure the target path aligns with your target cluster’s Access Zone mapping. For more details on configuring network storage export paths, check our step-by-step guide on Creating NFS Shares in Dell EMC Isilon OneFS.
Selecting Replication Schedule and RPO Thresholds
SyncIQ offers flexible schedule triggers that directly govern your cluster’s RPO and RTO settings:
Manual Execution: The policy runs only when explicitly triggered by an administrator via WebUI, CLI, or API call. Useful for ad-hoc backups or major planned maintenance migrations.
Scheduled Execution (Cron Timer): The policy runs automatically on a fixed calendar schedule (e.g., every 4 hours, daily at 02:00, or weekly on Sundays). You can set custom cron syntax expressions directly in the console.
Continuous Execution (Change-Driven): SyncIQ continuously monitors the source directory for file modifications. As soon as a file is closed after modification, SyncIQ queues an automated micro-delta replication job. This provides the lowest possible RPO (near zero) but increases cluster background processing load.
Set the RPO Alert Threshold parameter (e.g., 24 hours). If a job fails or network congestion delays job completion beyond this limit, OneFS raises a high-severity cluster alert notifying storage admins that the recovery point objective has been breached.
Step 3: Define File Matching Filters and Network Restrictions
Replicating unnecessary temporary files or log archives consumes valuable WAN bandwidth and slows down job completion times. Step 3 allows you to apply precise file matching criteria to fine-tune what data gets transmitted.
In the File Matching Criteria section, configure rule filters based on file properties:
- File Name / Extension Exclusion: Exclude temporary swap files or intermediate compile outputs by adding glob patterns like
*.tmp,*.iso,*.bak, or.DS_Store. - File Size Constraints: Exclude files larger or smaller than specific thresholds if only sub-gigabyte configuration data needs replicating.
- Path Filters: Exclude specific subdirectories within the source root path (e.g., exclude
/ifs/data/engineering/projects/scratch_logs). - Attribute Matching: Filter by file creation date, last modification timestamp, or specific POSIX/ACL permission flags.
To optimize network utilization and prevent replication traffic from overwhelming client SMB/NFS access, expand the Network Restrictions tab during creation:
- Source Network Pool: Restrict SyncIQ traffic on the source cluster to a dedicated IP address pool (e.g.,
subnet0:pool_synciq) bound to high-speed 25GbE/100GbE interfaces. - Bandwidth Throttling: Set maximum megabytes-per-second (MB/s) upload caps during business hours to protect WAN links shared with core enterprise applications.
- Worker Threads per Node: Adjust SyncIQ performance tuning parameters such as max parallel workers per node (default is 4 per node) depending on CPU headroom and cluster load.
Step 4: Execute the Initial Baseline Sync and Monitor Job Progress
Once you click Save Policy, the configuration is stored in the OneFS configuration database. However, data transmission does not begin until the first job execution starts.
Follow these execution and verification steps:
1. Trigger Initial Full Sync: On the Data Protection > SyncIQ > Policies screen, locate your newly created policy, click the Actions menu next to it, and select Start Job.
2. Understand Baseline Job Behavior: The initial full sync job scans the entire source directory tree, creates snapshot restore markers, and transmits all existing directories and data files to the target cluster. Depending on dataset size (terabytes vs petabytes) and network throughput, this baseline job can take several hours to complete.
An initial full sync job must complete successfully to establish a recovery point baseline before incremental delta syncs can take over.
3. Monitor Job Status in WebUI: Navigate to Data Protection > SyncIQ > Reports. Click on the active job run to view real-time metrics:
- Transmitted Bytes and Files Count
- Current Network Throughput (MB/s)
- Estimated Time to Completion (ETC)
- Active Node Workers and Connection State
4. Confirm Baseline Completion: Once the job status changes to Success, verify the target cluster file system. Navigate to the destination directory on the target cluster to confirm that directory trees, files, ownership attributes, and POSIX/ACL permissions match the source environment exactly.
Command Line Guide: Creating SyncIQ Policies via CLI
For storage engineers who prefer command-line automation, scripting, or Ansible workflows, OneFS provides complete SyncIQ management through the isi sync policies command family. You can complete the entire creation and baseline process over SSH.
Here is how to create and manage SyncIQ policies using the OneFS CLI:
1. Syntax to Create a Standard SyncIQ Policy
Use the isi sync policies create command to define a scheduled daily replication policy:
isi sync policies create \
  --name=SyncIQ_NFS_Projects_Daily \
  --action=sync \
  --source-root-path=/ifs/data/engineering/projects \
  --target-host=dr-cluster-synciq.domain.local \
  --target-path=/ifs/data/dr_replica/engineering/projects \
  --schedule="every 1 days at 02:00" \
  --rpo-alert=86400 \
  --enabled=true
2. Creating a Continuous (Change-Driven) Policy
To establish a continuous replication policy that transmits updates instantly whenever source files close, set the schedule parameter to when-source-modified:
isi sync policies create \
  --name=SyncIQ_Finance_Continuous \
  --action=sync \
  --source-root-path=/ifs/data/finance \
  --target-host=dr-cluster-synciq.domain.local \
  --target-path=/ifs/data/dr_replica/finance \
  --schedule=when-source-modified \
  --rpo-alert=3600 \
  --enabled=true
3. Adding File Matching Rules and Network Constraints via CLI
To include file filters that exclude temporary files and restrict replication traffic to a dedicated source SmartConnect pool, append network parameters:
isi sync policies modify SyncIQ_NFS_Projects_Daily \
  --file-matching-pattern="*.tmp" \
  --file-matching-pattern-type=exclude \
  --source-network-pool=subnet0:pool_synciq \
  --workers-per-node=4
4. Triggering and Checking Policy Status via CLI
To manually start the baseline replication job and inspect runtime progress, use the following operational commands:
# Start the initial baseline sync job
isi sync jobs start --policy=SyncIQ_NFS_Projects_Daily

# View active running replication jobs
isi sync jobs list

# Check detailed status report of the policy
isi sync reports list --policy=SyncIQ_NFS_Projects_Daily

# View current policy configuration settings
isi sync policies view SyncIQ_NFS_Projects_Daily
Common SyncIQ Policy Configuration Mistakes to Avoid
Avoid these frequent engineering errors when configuring PowerScale SyncIQ replication policies:
- Overlapping Source Paths: Do not create two separate SyncIQ policies that overlap the same directory paths (for example, Policy A covering
/ifs/dataand Policy B covering/ifs/data/projects). Overlapping policies cause lock contention, redundant snapshot generation, and job failure errors. - Unrestricted Source Network Interface: Failing to restrict SyncIQ to a dedicated front-end network pool can saturate management interfaces or default client networks, causing NFS/SMB timeouts for production users during heavy replication runs.
- Ignoring Target Capacity and Quotas: Always verify that the target cluster target pool has sufficient free physical capacity and SmartQuotas configured. If the target path runs out of space during a job, SyncIQ fails and leaves the target snapshot in an incomplete state.
- Modifying Target Cluster Files Directly: SyncIQ maintains target directories in a read-only state. Writing data directly to a SyncIQ target path without initiating a formal failover breaks snapshot tracking and causes subsequent incremental sync jobs to fail with state conflict errors.
- Misconfigured SSL Certificates: Expired or un-imported cluster certificates will immediately block scheduled replication runs. Set up automated calendar reminders to renew and re-import cluster TLS certificates before expiration dates.
What to Do Next: Disaster Recovery Testing and Automated Failover
Creating and running your SyncIQ policy is only the first half of a robust disaster recovery plan. Once your initial baseline sync is complete and automated incremental jobs are running successfully, you must validate your failover readiness.
Take the following next steps to complete your business continuity strategy:
1. Perform a Planned Failover Test: Schedule a maintenance window to test failover procedures. Use the command isi sync recovery failover --policy=<policy_name> to make the target cluster directory writeable, break replication sync, and point test host clients to the target IP address.
2. Test Failback Operations: Practice failback using isi sync recovery resync-prep and isi sync recovery failback commands. Resync-prep creates a mirror reverse policy on the target cluster, syncs changes made at DR back to the primary site, and restores primary site master controls.
3. Integrate Dell Data Protection Software: For automated orchestrations across enterprise sites, consider deploying Dell PowerScale Disaster Recovery software or Dell Enterprise Copy Services to automate DNS SmartConnect failover and application redirection during site outages.
4. Schedule Quarterly Audits: Set a recurring quarterly audit to review SyncIQ performance logs, confirm RPO threshold compliance, verify target disk capacity, and test certificate validity across all source and target cluster endpoints.
Key Takeaways
- Licenses Required: SyncIQ policy setup requires valid, active SyncIQ licenses installed on both source and target PowerScale clusters before job execution.
- Flexible Triggers: SyncIQ supports manual, scheduled cron-based, and continuous change-driven replication triggers to meet stringent RPO requirements.
- Bandwidth Efficiency: Implementing file matching criteria (include/exclude filters) and dedicated network pools optimizes WAN throughput and protects client traffic.
- Baseline First: Incremental delta syncs depend entirely on a successfully completed initial baseline sync job.
- CLI Automation: All WebUI policy creation steps can be automated using
isi sync policies createand monitored withisi sync jobscommands.